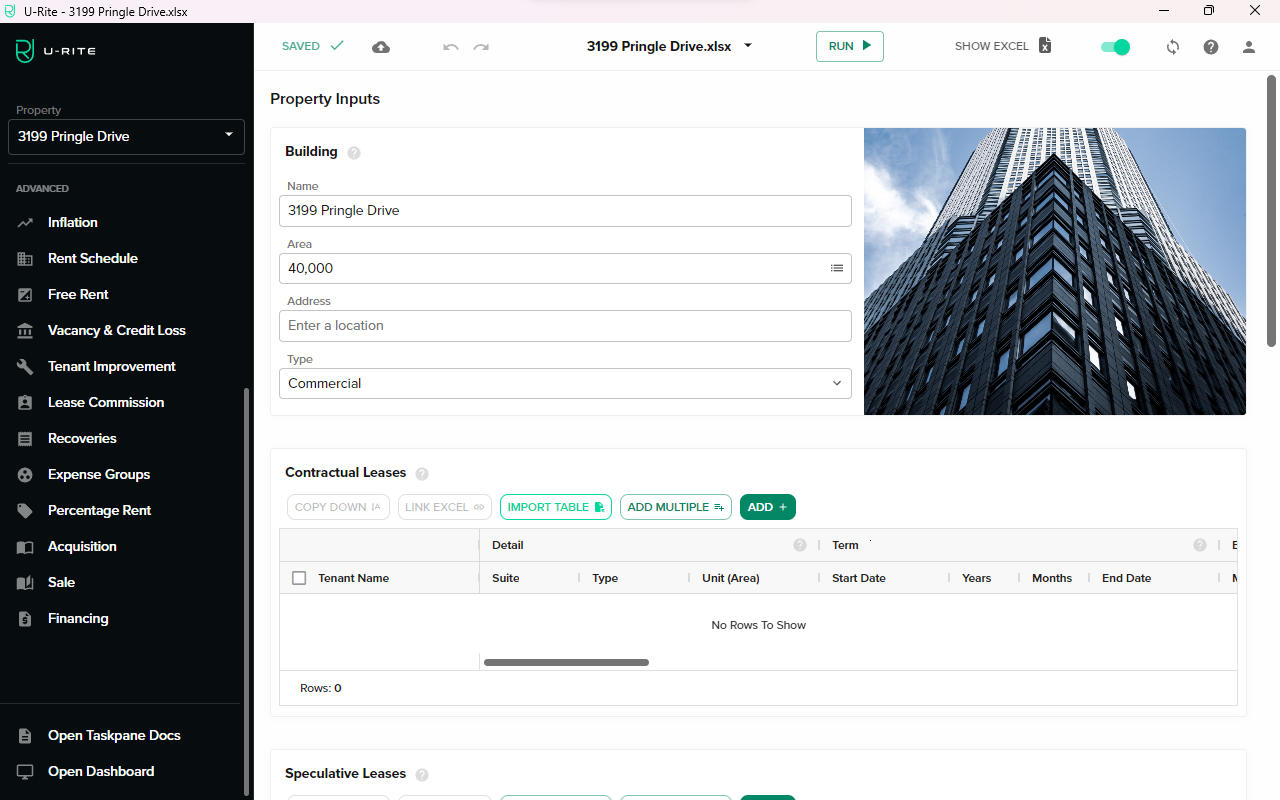
Import Table
Introduction
The Import Table feature empowers users to seamlessly extract tabular data into the U-Rite. This functionality streamlines the process of working with various data sets within U-Rite.
The Import Table process is a simple, four-step procedure. Users must successfully complete each step before advancing to the next. Please note that the NEXT and IMPORT buttons would be unavailable if the current step does not meet the necessary criteria. Ensure that you check the bottom left corner for any notifications for issues that require resolution. Here are the four steps:
Steps
-
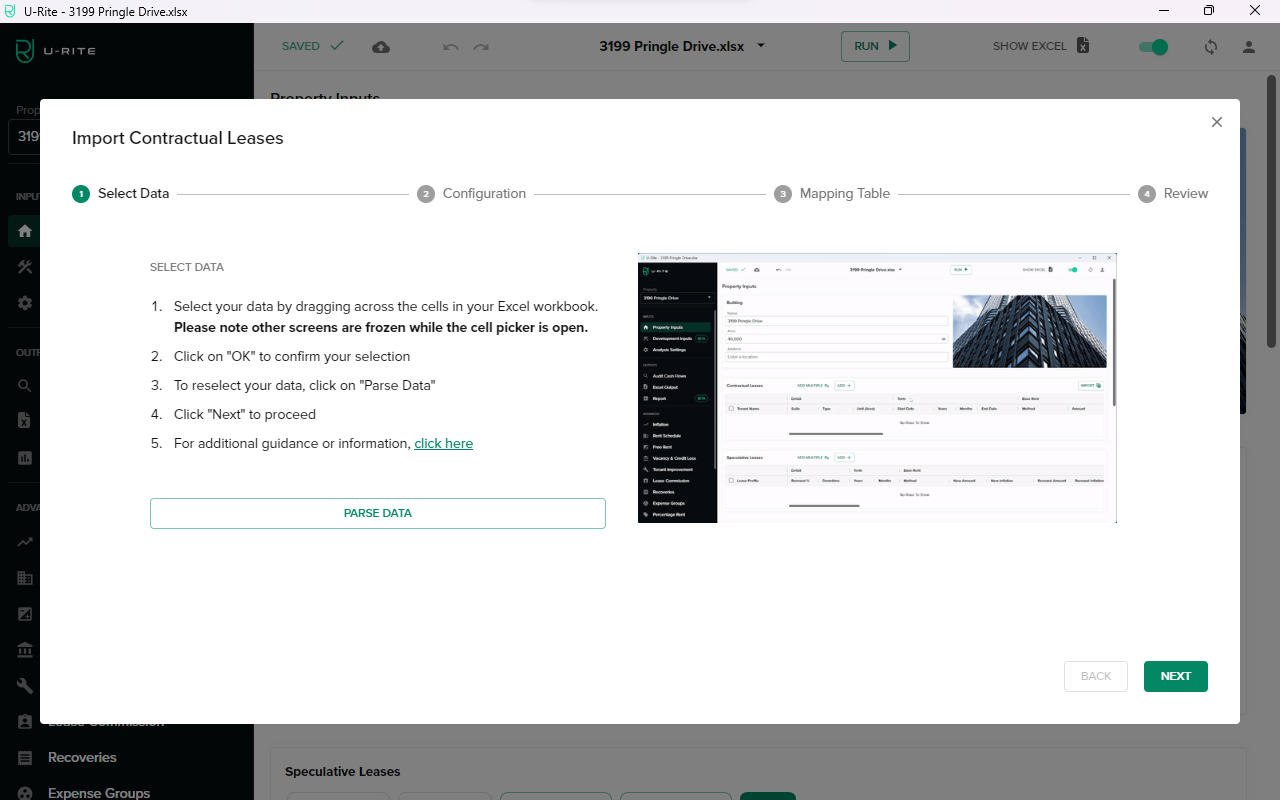
Select Data
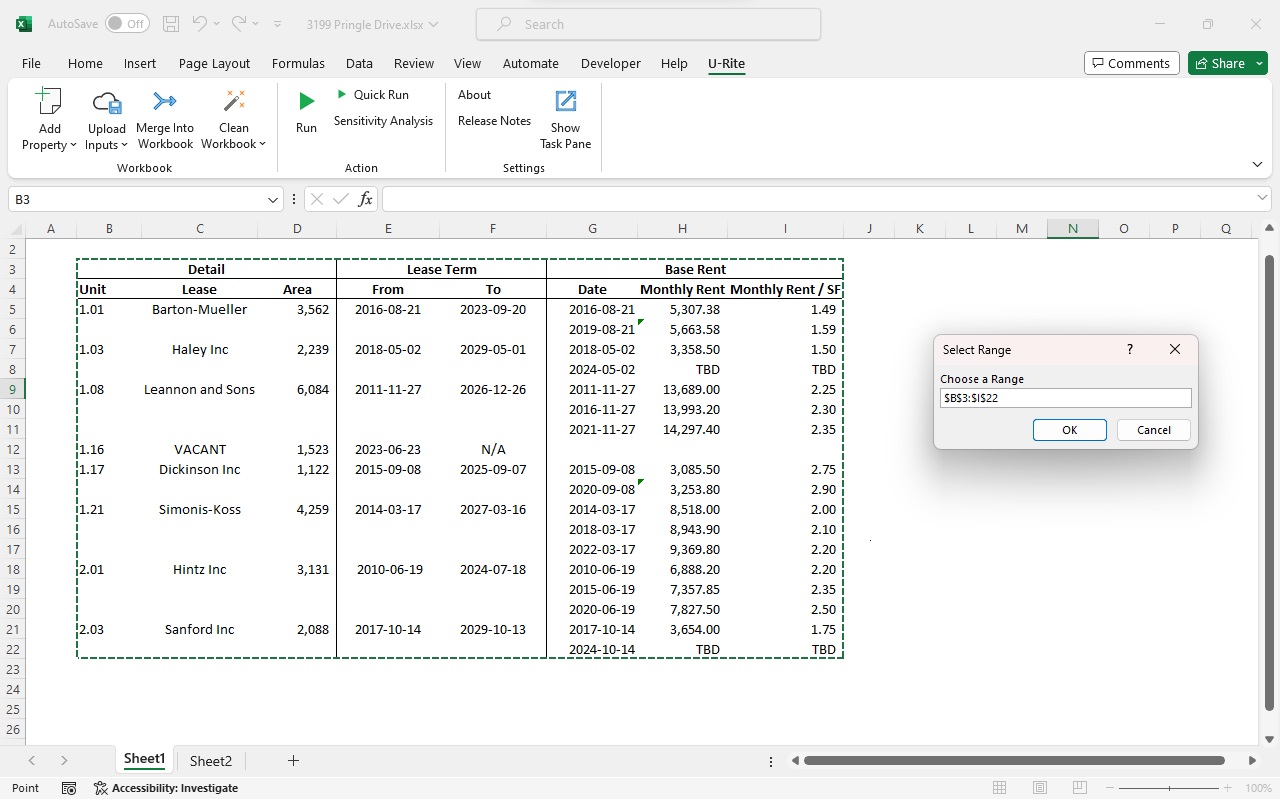
When the user clicks the IMPORT (
 ) button at the top left of the table, the current active Excel worksheet will appear and prompt you to select range. After you select your data, click OK then NEXT to proceed next step.
 -
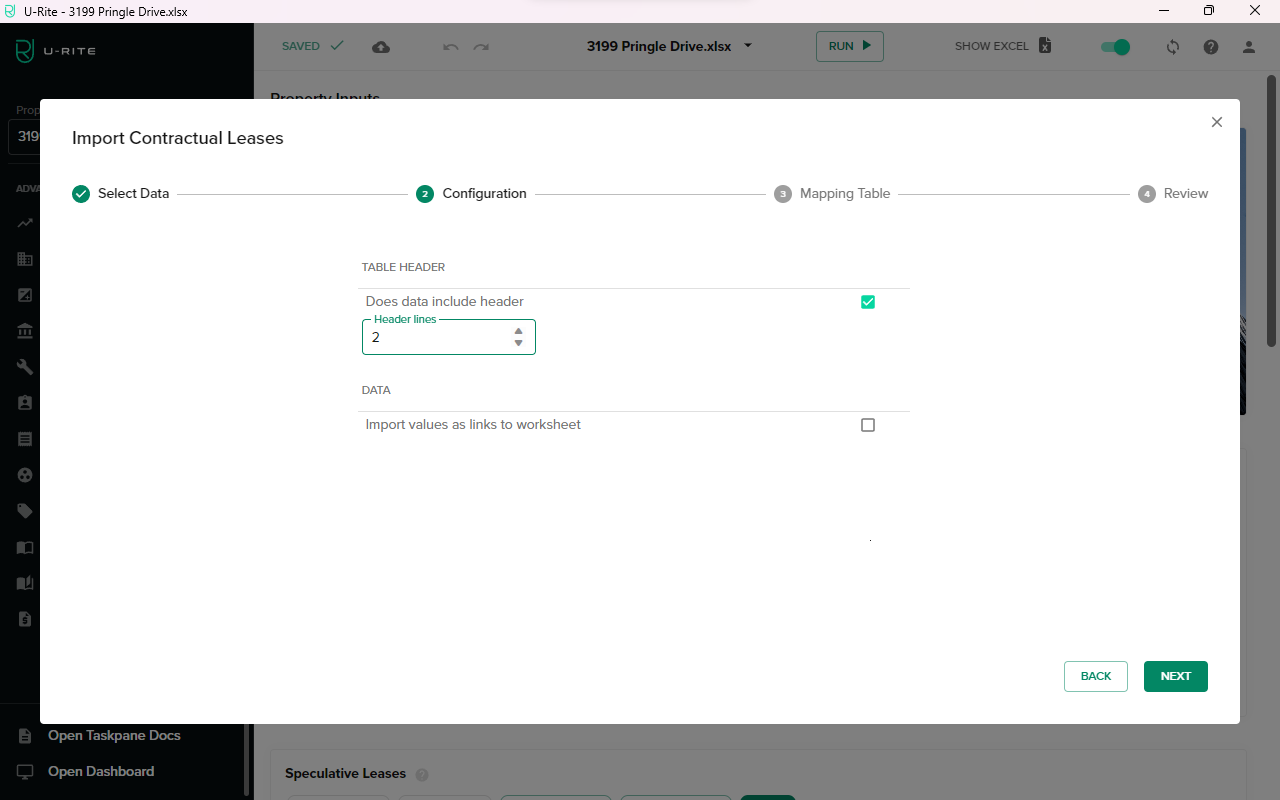
Configuration
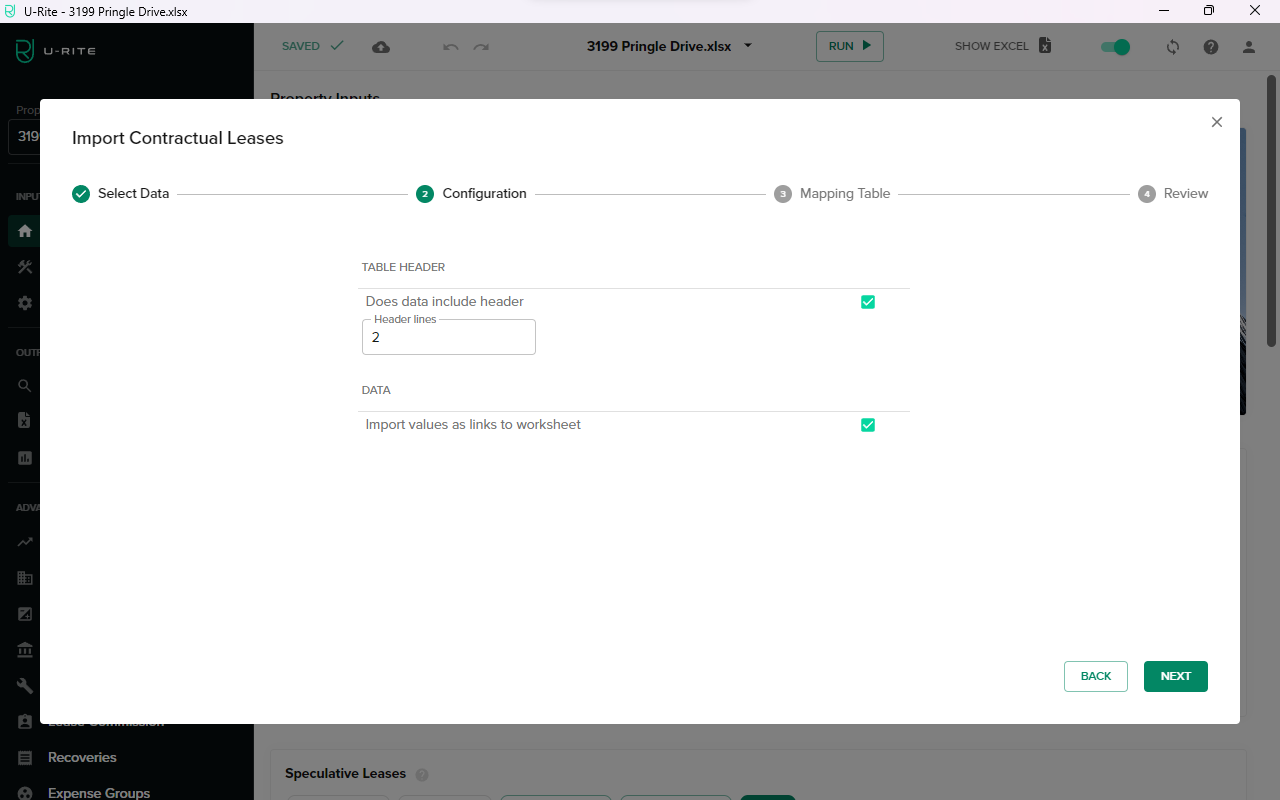
Depending on the imported data, users can enable the Does data include header option and specify the number of header lines. In cases where the table lacks a header, users can manually define the target header. Additionally, users have the option to treat data as linked values by selecting the Use value as Linked Value checkbox. -
Mapping Table
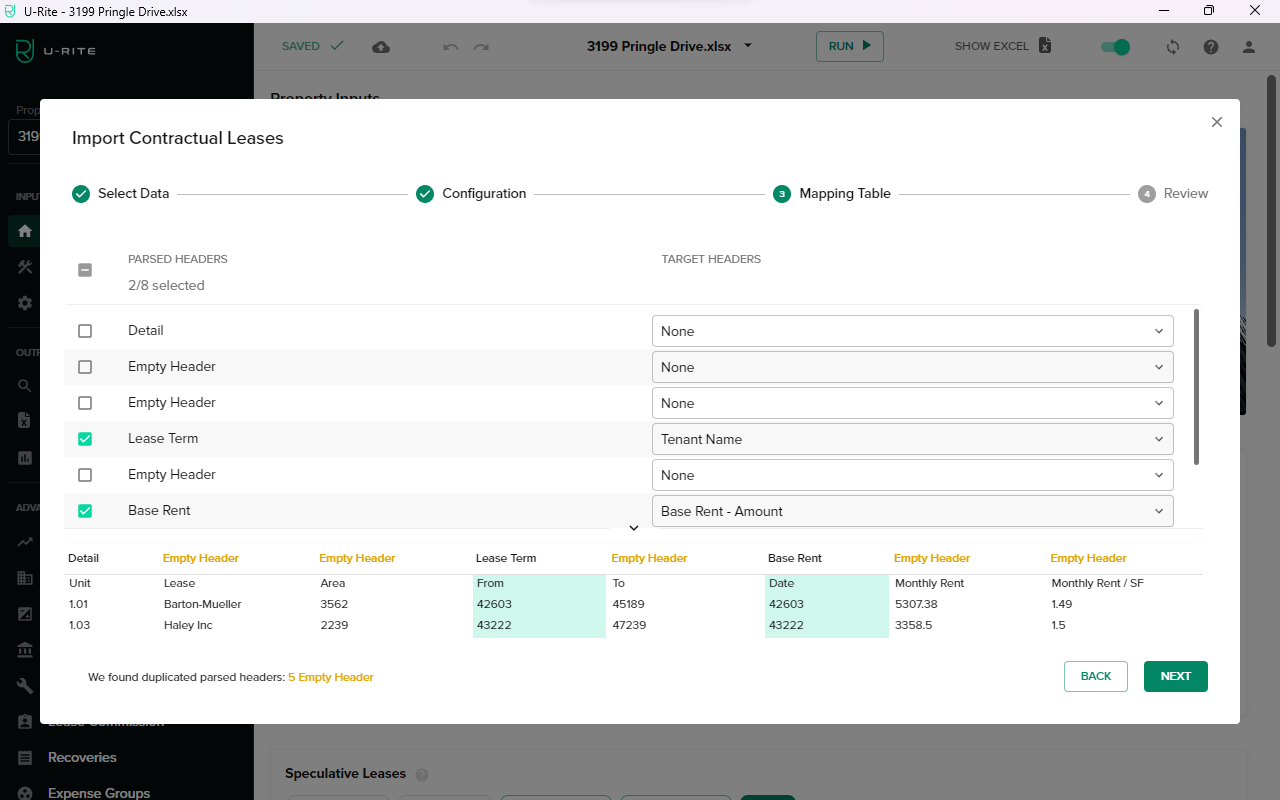
Once configured, U-Rite will automatically analyze the header and suggest the most suitable header model to import. The first prediction will be pre-selected, while duplicated predictions will not. It is the user's responsibility to review and confirm the headers to import, resolving any conflicts or errors that may arise.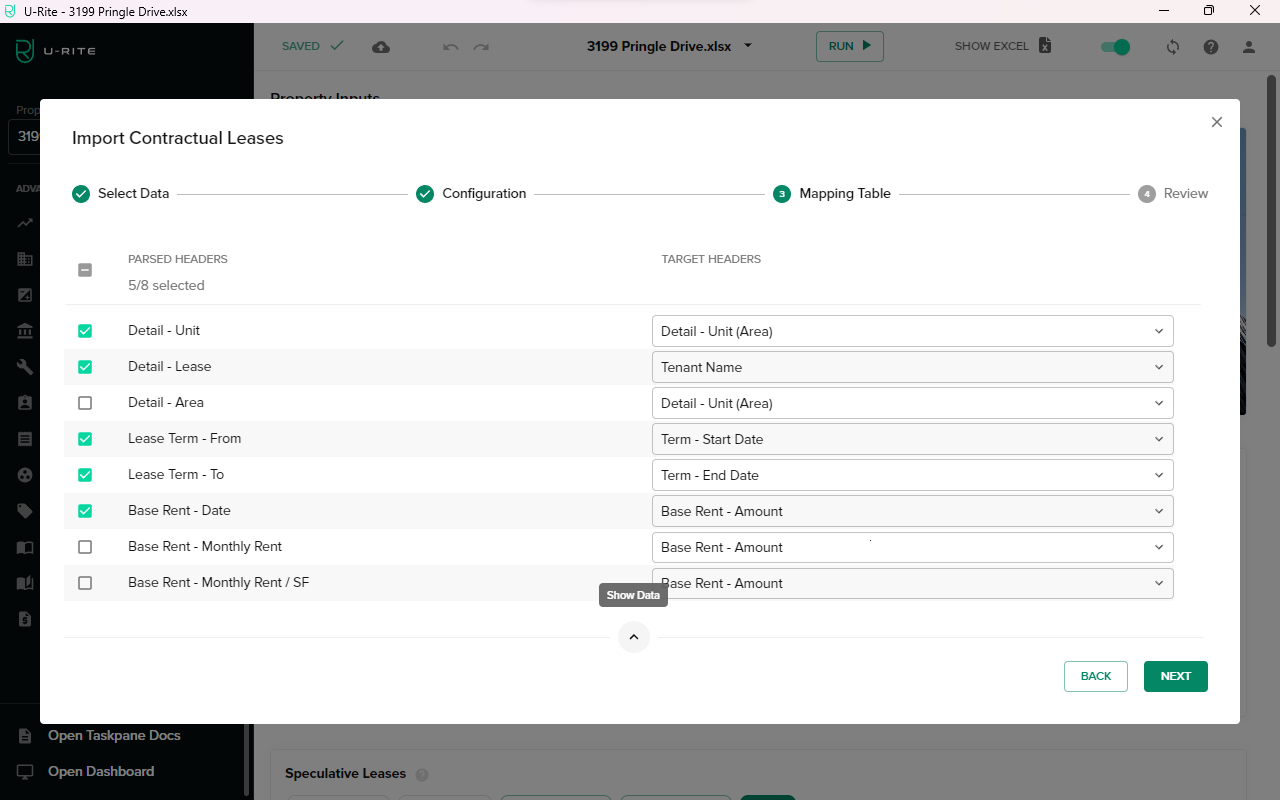 info
infoPreview: A selected data preview is available. Click the ᐱ button to expand the collapsed preview.
-
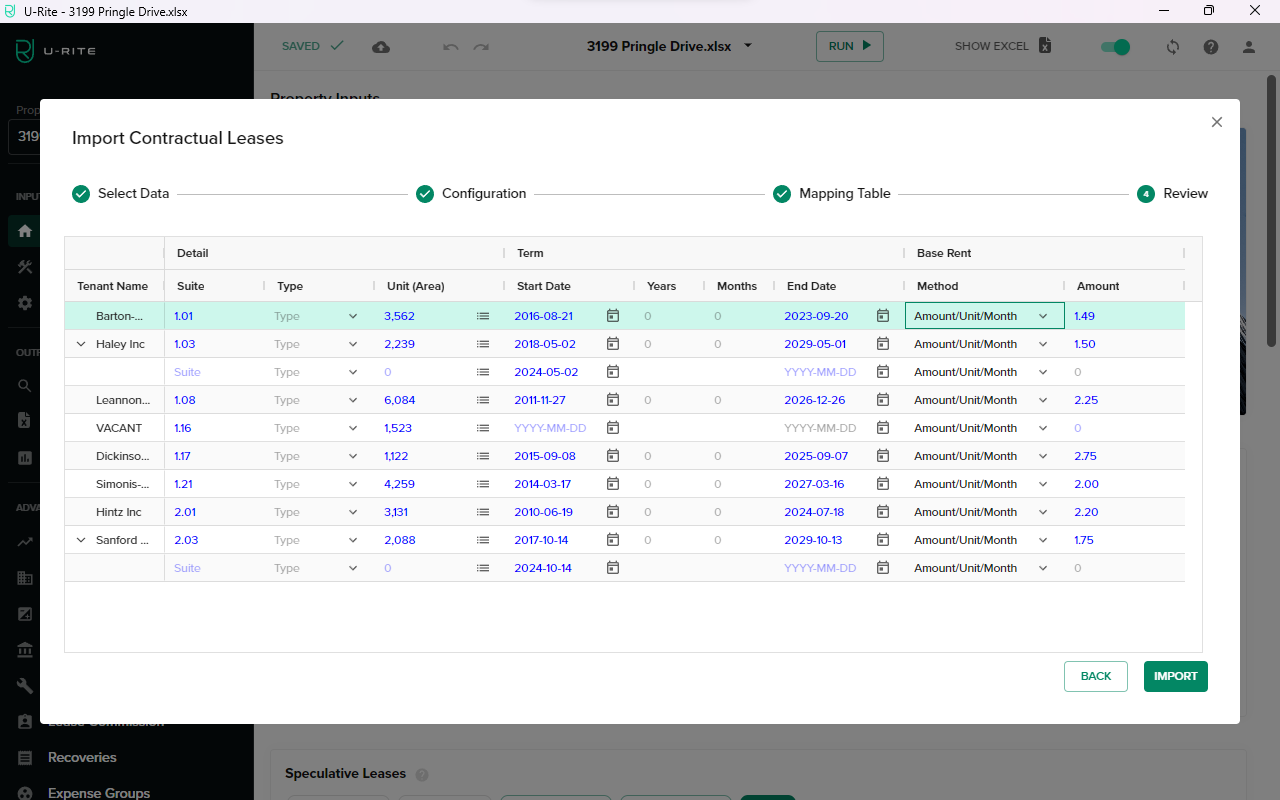
Review and Correct Data
In this step, users should meticulously review and rectify any invalid data within the designated cells. Invalid data will be highlighted in red, and notifications will appear at the bottom left corner of the interface. Users can adjust the method while reviewing the table. Once all necessary adjustments have been made, click the "Import" button to complete the process.
Import Rent Roll
U-Rite's Import Rent Roll feature has the ability to pull complex and detailed Rent Roll data into the U-Rite. For this demonstration, we will showcase how this feature can be utilized in an example where the data includes multiple rent start dates and base rent amounts under the same tenant. Click to Download Excel file and follow along with this demonstration.
Here are the steps to import a Rent Roll:
-
Click the IMPORT button.
-
Select the range of table data and then click OK.
-
Parse Table Data dialog will appear, providing instructions and displaying the Excel worksheet for selecting the table data. If the range picker closes before data is input or if you would like to reselect the data, it can be triggered again from the Parse Data button. Once complete, click the Next button which should now be enabled.
-
Provide information about how you have your table format configured. Select the data output format; The default setting is in value format.
-
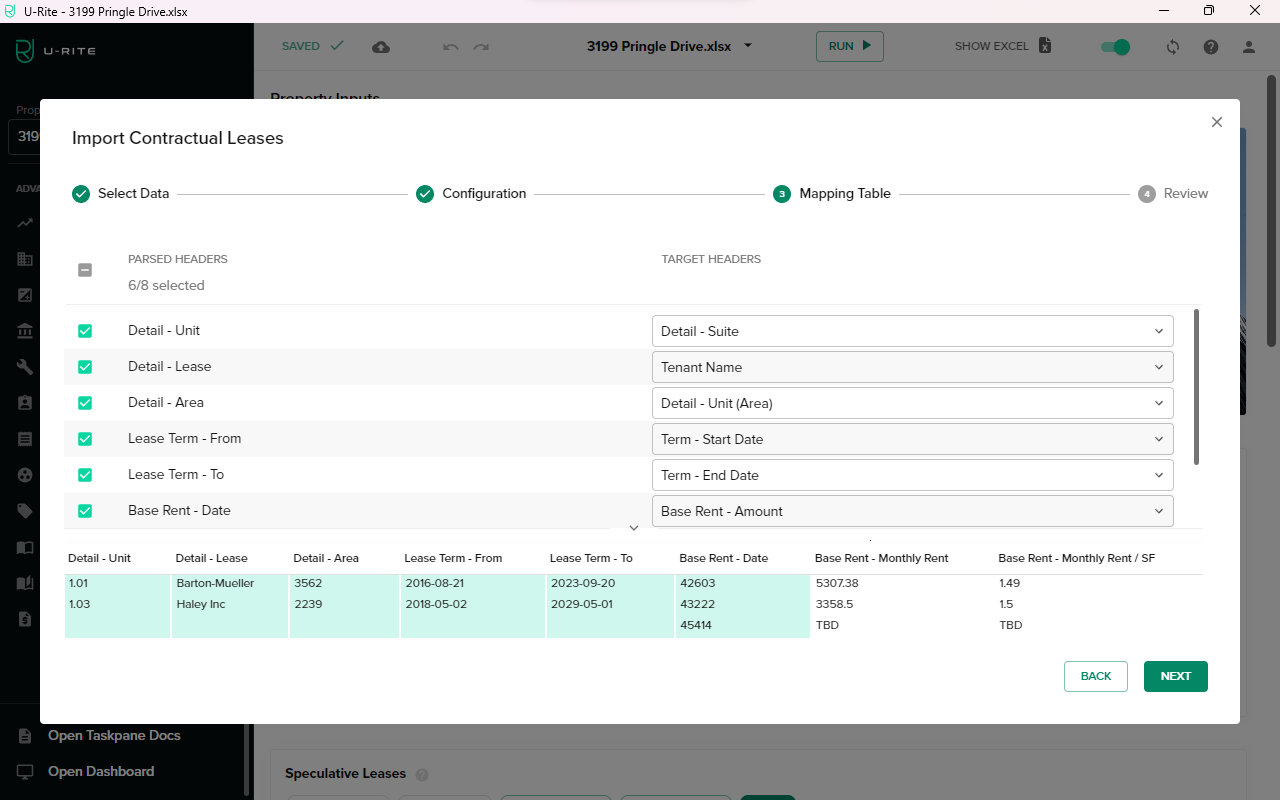
Review the header predictions in the Target Header and click ᐱ for a preview.
-
U-Rite detects 5 duplicated Empty Headers. Check your header lines in your configuration. If your settings are correct, you may ignore the warning. In this demo, please return to the previous step and set Header lines to 2.
-
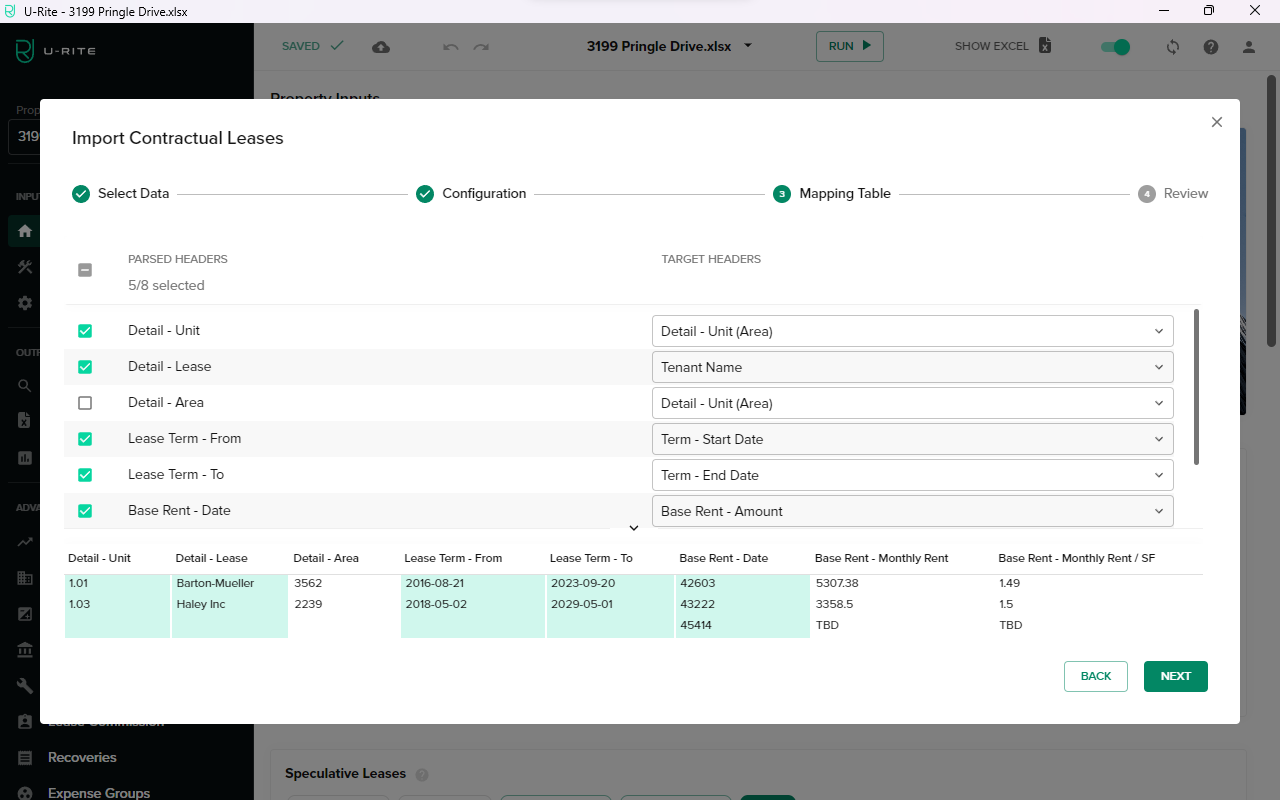
You will now see the headers populated as expected. Make sure Detail - Area is selected.
-
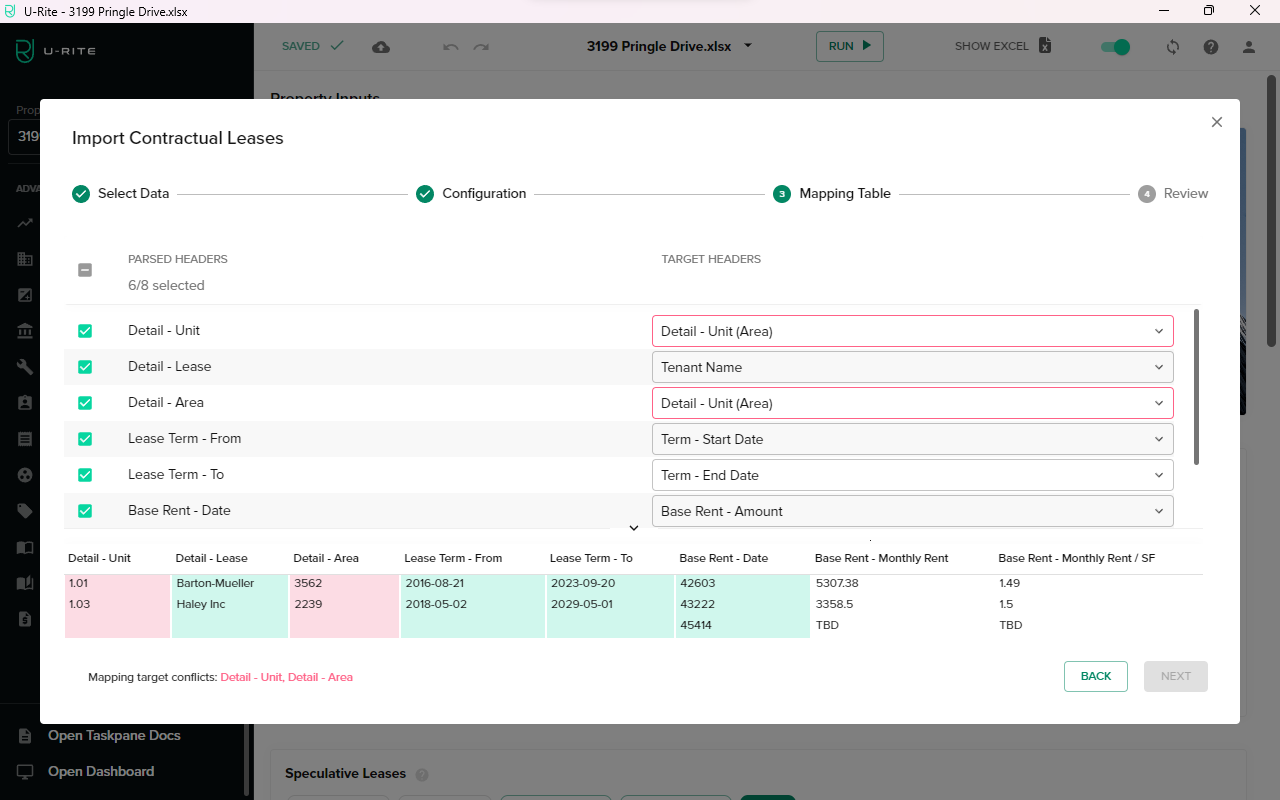
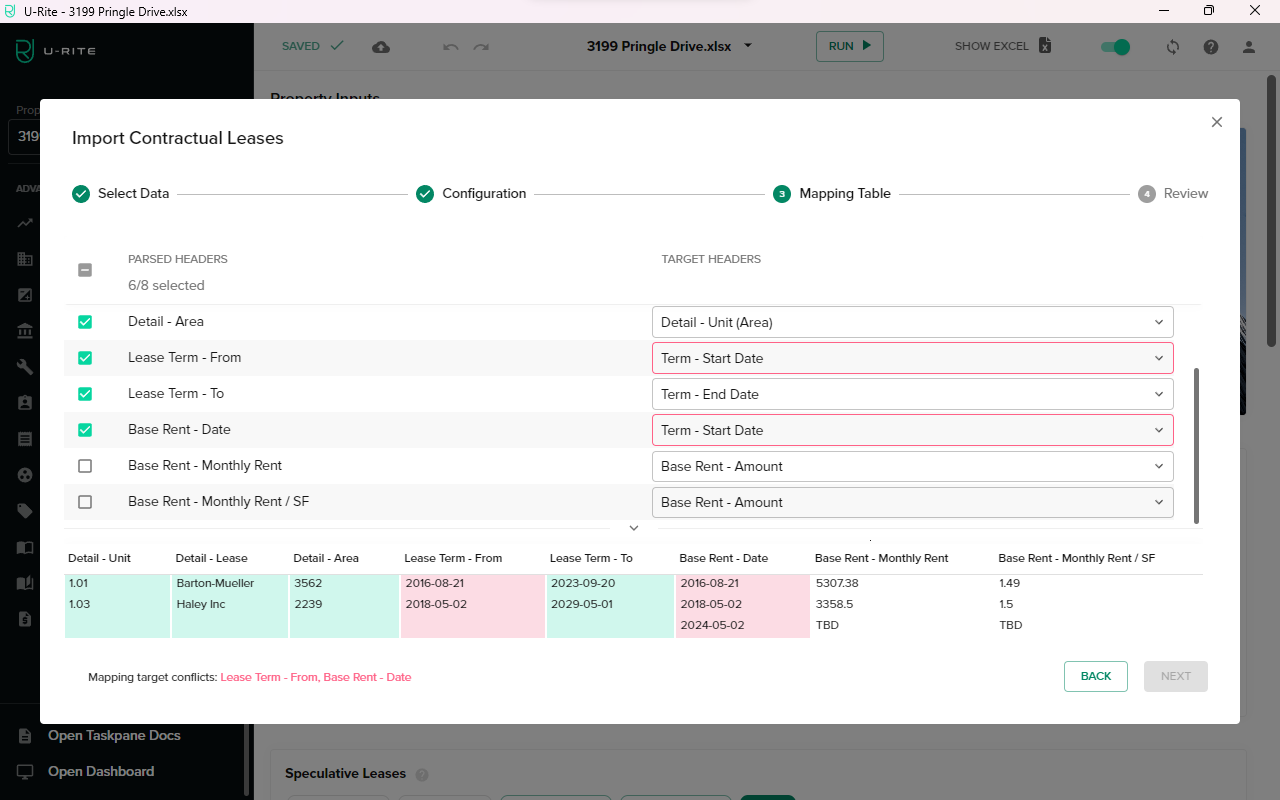
The mapper will indicate any potential target header conflicts. To correct this issue, from the Default - Unit dropdown, set Area to Suite.
-
The Area conflict is now resolved.
-
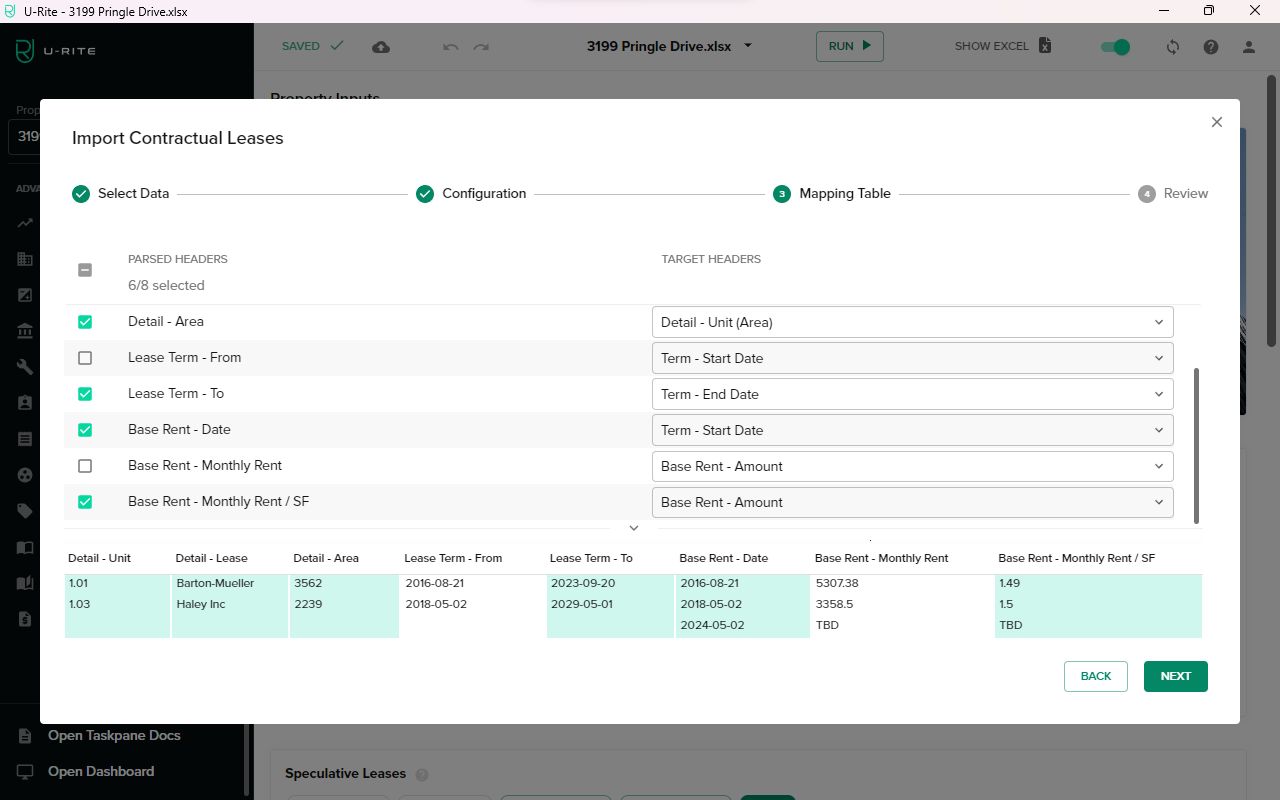
In U-Rite, dates are stored in Excel date format. When you set the Target Header to Term Date, the U-Rite will automatically convert it into the standard yyyy-mm-dd format. Change the Base Rent - Date target header to Start Date.
-
Uncheck Lease Term - From.

-
Make sure Base Rent - Monthly Rent / SF is set to Base Rent Amount, then click NEXT.
-
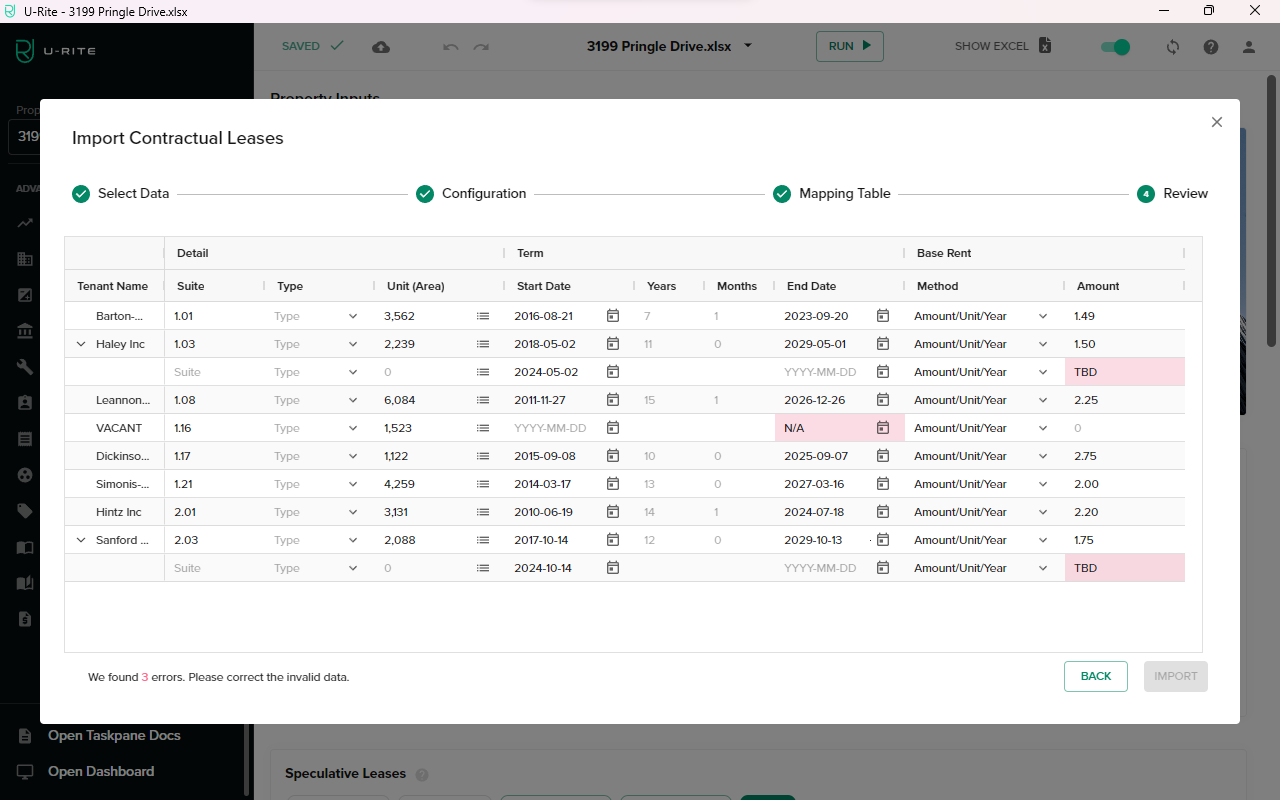
Review the parsed data and address any invalid entries. U-Rite will indicate errors in the bottom left corner. For this demonstration, remove all three invalid data entries to proceed.
-
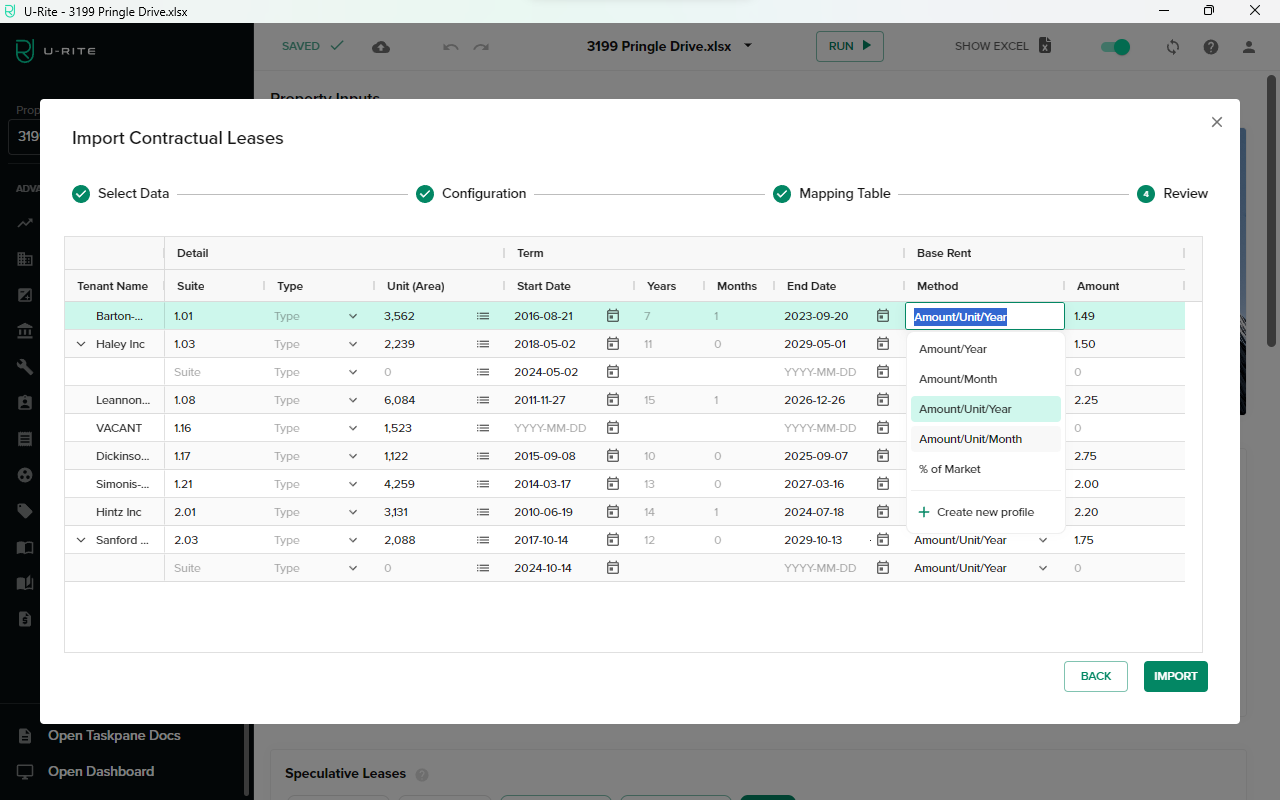
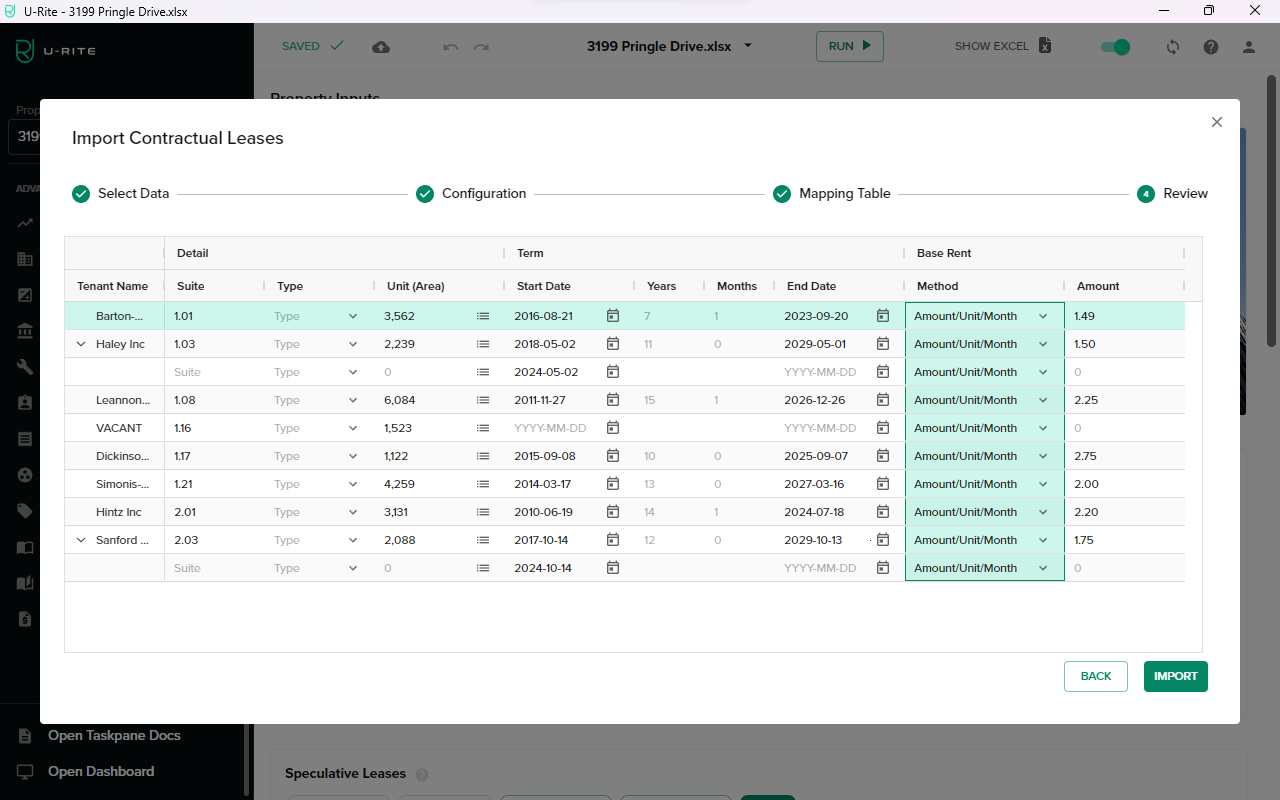
Update the Base Rent Method to Amount/Unit/Month, as the amount references the Base Rent - Monthly Rent / SF column.
-
You can drag and select the entire Base Rent Method column data and press Ctrld to apply the first entry to the rest of the rows below.
-
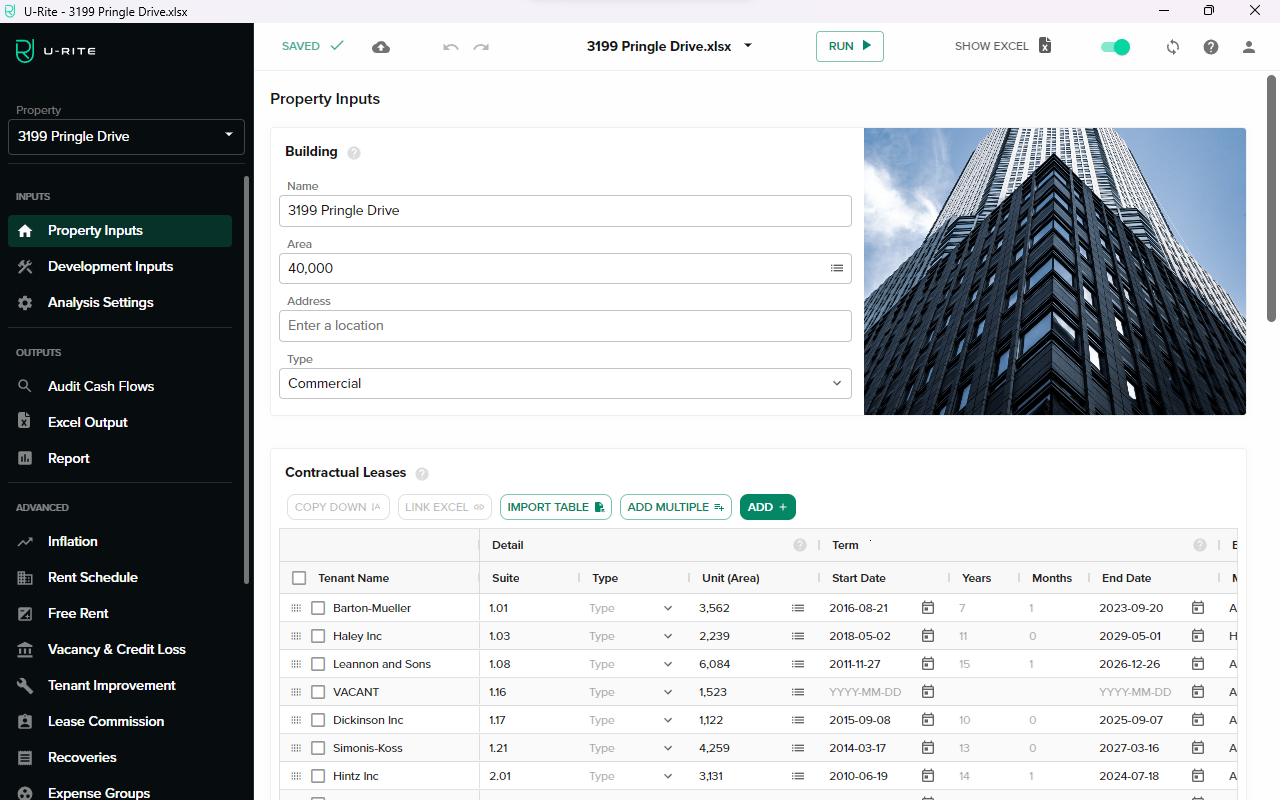
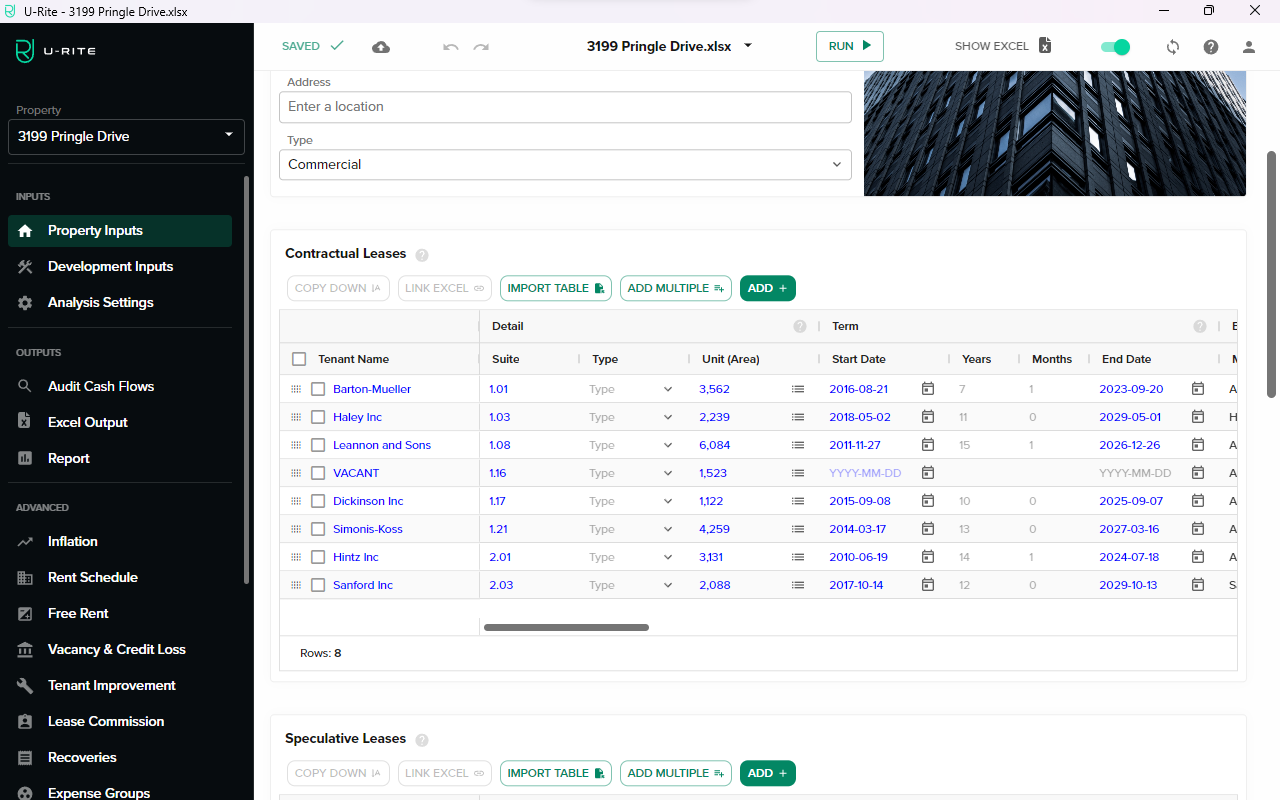
Tenants are now successfully imported into the Rent Roll Table.
-
On the Sidebar, click Rent Schedule, and access each tenant's rent schedule for more details.

Import data as Linked Values
-
Enable the Import values as links to worksheet option in the configuration.
-
After mapping headers, you'll notice that link values are displayed in blue on the review table.
-
Tenants are imported as linked values into the Rent Roll Table.
-
The Rent Schedule is also imported as linked values.
